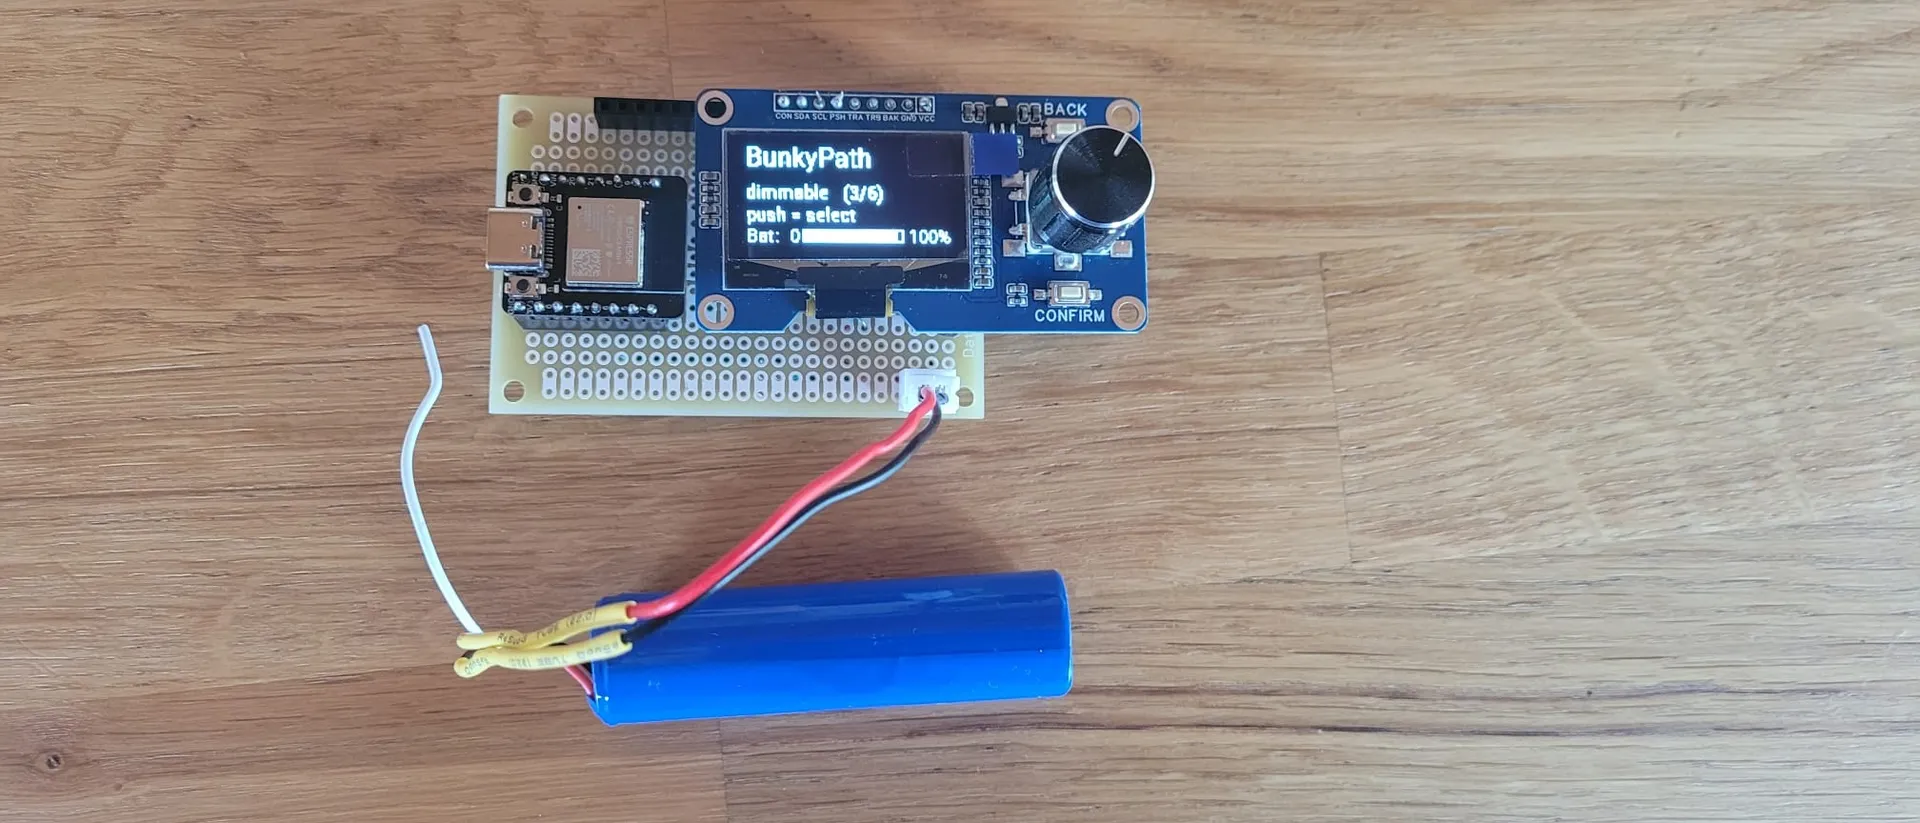
MVdialer: a battery-powered “dial-a-device” remote for Home Assistant
The problem I was actually trying to solve
Up at the lake I run everything through a Home Assistant Green — a growing pile of landscape lighting (ESP32s and MOSFETs driving 12 V fixtures), bedroom lights, fans, and whatever else I keep bolting on.
It all works great. For me.
The trouble is guests. When people visit the cottage, none of that automation is theirs to touch. Sure, they could install the Home Assistant app, get an account, get authorized, learn the dashboard… but most people don’t want to do that, and honestly they shouldn’t have to. You’re on vacation. You want to turn the lights down, not onboard onto someone else’s smart home.
So — another opportunity to automate.
What I wanted was something that felt like a remote: sitting on the counter, battery powered, with a little screen and a knob. You scroll through the handful of devices I’ve decided a guest should see, click to pick one, and turn it on, off, or dim it. No phone. No login. No instructions taped to the fridge.
That idea became MVdialer.
The parts, and why the ESP32-C3
I had most of the pieces on hand, which is half the reason it happened at all:
| Part | What it is |
|---|---|
| MCU board | DFRobot Beetle ESP32-C3 (DFR0868-A) — 25 × 20.5 mm RISC-V board |
| Input + display | M75-1.3-OLED-bai — an EC11 rotary encoder with push, a 1.3” OLED, and two side buttons, all as one module |
| OLED controller | SH1106, 128 × 64, monochrome (1-bit), I²C at address 0x3C |
| Power | LiPo battery, charged over USB-C [2400 MhA] |
Having the OLED and encoder as a single module meant the display and the knob came pre-wired together — one less thing to fuss over.
Two things sold me on the C3 for this. First, it’s even smaller than the old ESP8266 boards I usually reach for — the trade-off being fewer GPIO pins, which turned out not to matter here. Second, and this is the good part: it has on-board LiPo charging. Plug in the same USB-C you flash it with and the battery tops up. That’s what makes the whole thing genuinely cordless — you charge it like a phone and forget about it.
[EDITOR: rough total cost here if you want it — DIYers scroll for this first.]
The build journey (a.k.a. where the interesting decisions were)
The hardware came together quickly. The part I actually spent time on — and the part I think is worth sharing — was one deceptively simple question:
How does the puck know which devices to show?
I went through three answers.
Attempt 1 — Home Assistant helpers. The first suggested approach was to define the device list using HA helpers. It works, but it felt cumbersome for something I’d be editing casually. Too many clicks for “add a lamp.”
Attempt 2 — hardcode the list in the ESPHome YAML. Simpler to reason about, and faster to write. But now every time I added, removed, or renamed a device I had to recompile and re-flash the firmware. For a device that’s supposed to live at a cottage I visit occasionally, that’s exactly the wrong kind of friction.
Attempt 3 — a plain text file served by Home Assistant. This is where it clicked.
I put a simple text file in HA’s www directory and let the puck fetch it. To add or
rename a device, I edit one line in a text file and wake the puck. No recompile, no
OTA, no build machine at the cottage at all.
That last option won for a reason I really like: it doesn’t add a new point of failure. The puck already depends on Home Assistant to actually control anything — so hosting the device list on that same HA means if the list is reachable, control is reachable, and if HA is down, well, there was nothing to control anyway. (More on how it survives a bad fetch below.)
The other big win came late and surprised me: deep sleep. Before I enabled it, the puck lasted 2–3 days on a charge. After — more than a week, which was my actual design goal, because the cottage sits idle for a week at a time and I don’t want to babysit a battery. Same hardware, one architectural change, roughly a 3× improvement in runtime.
What it’s like to use
You pick it up, give the knob a turn, and the screen lights up.
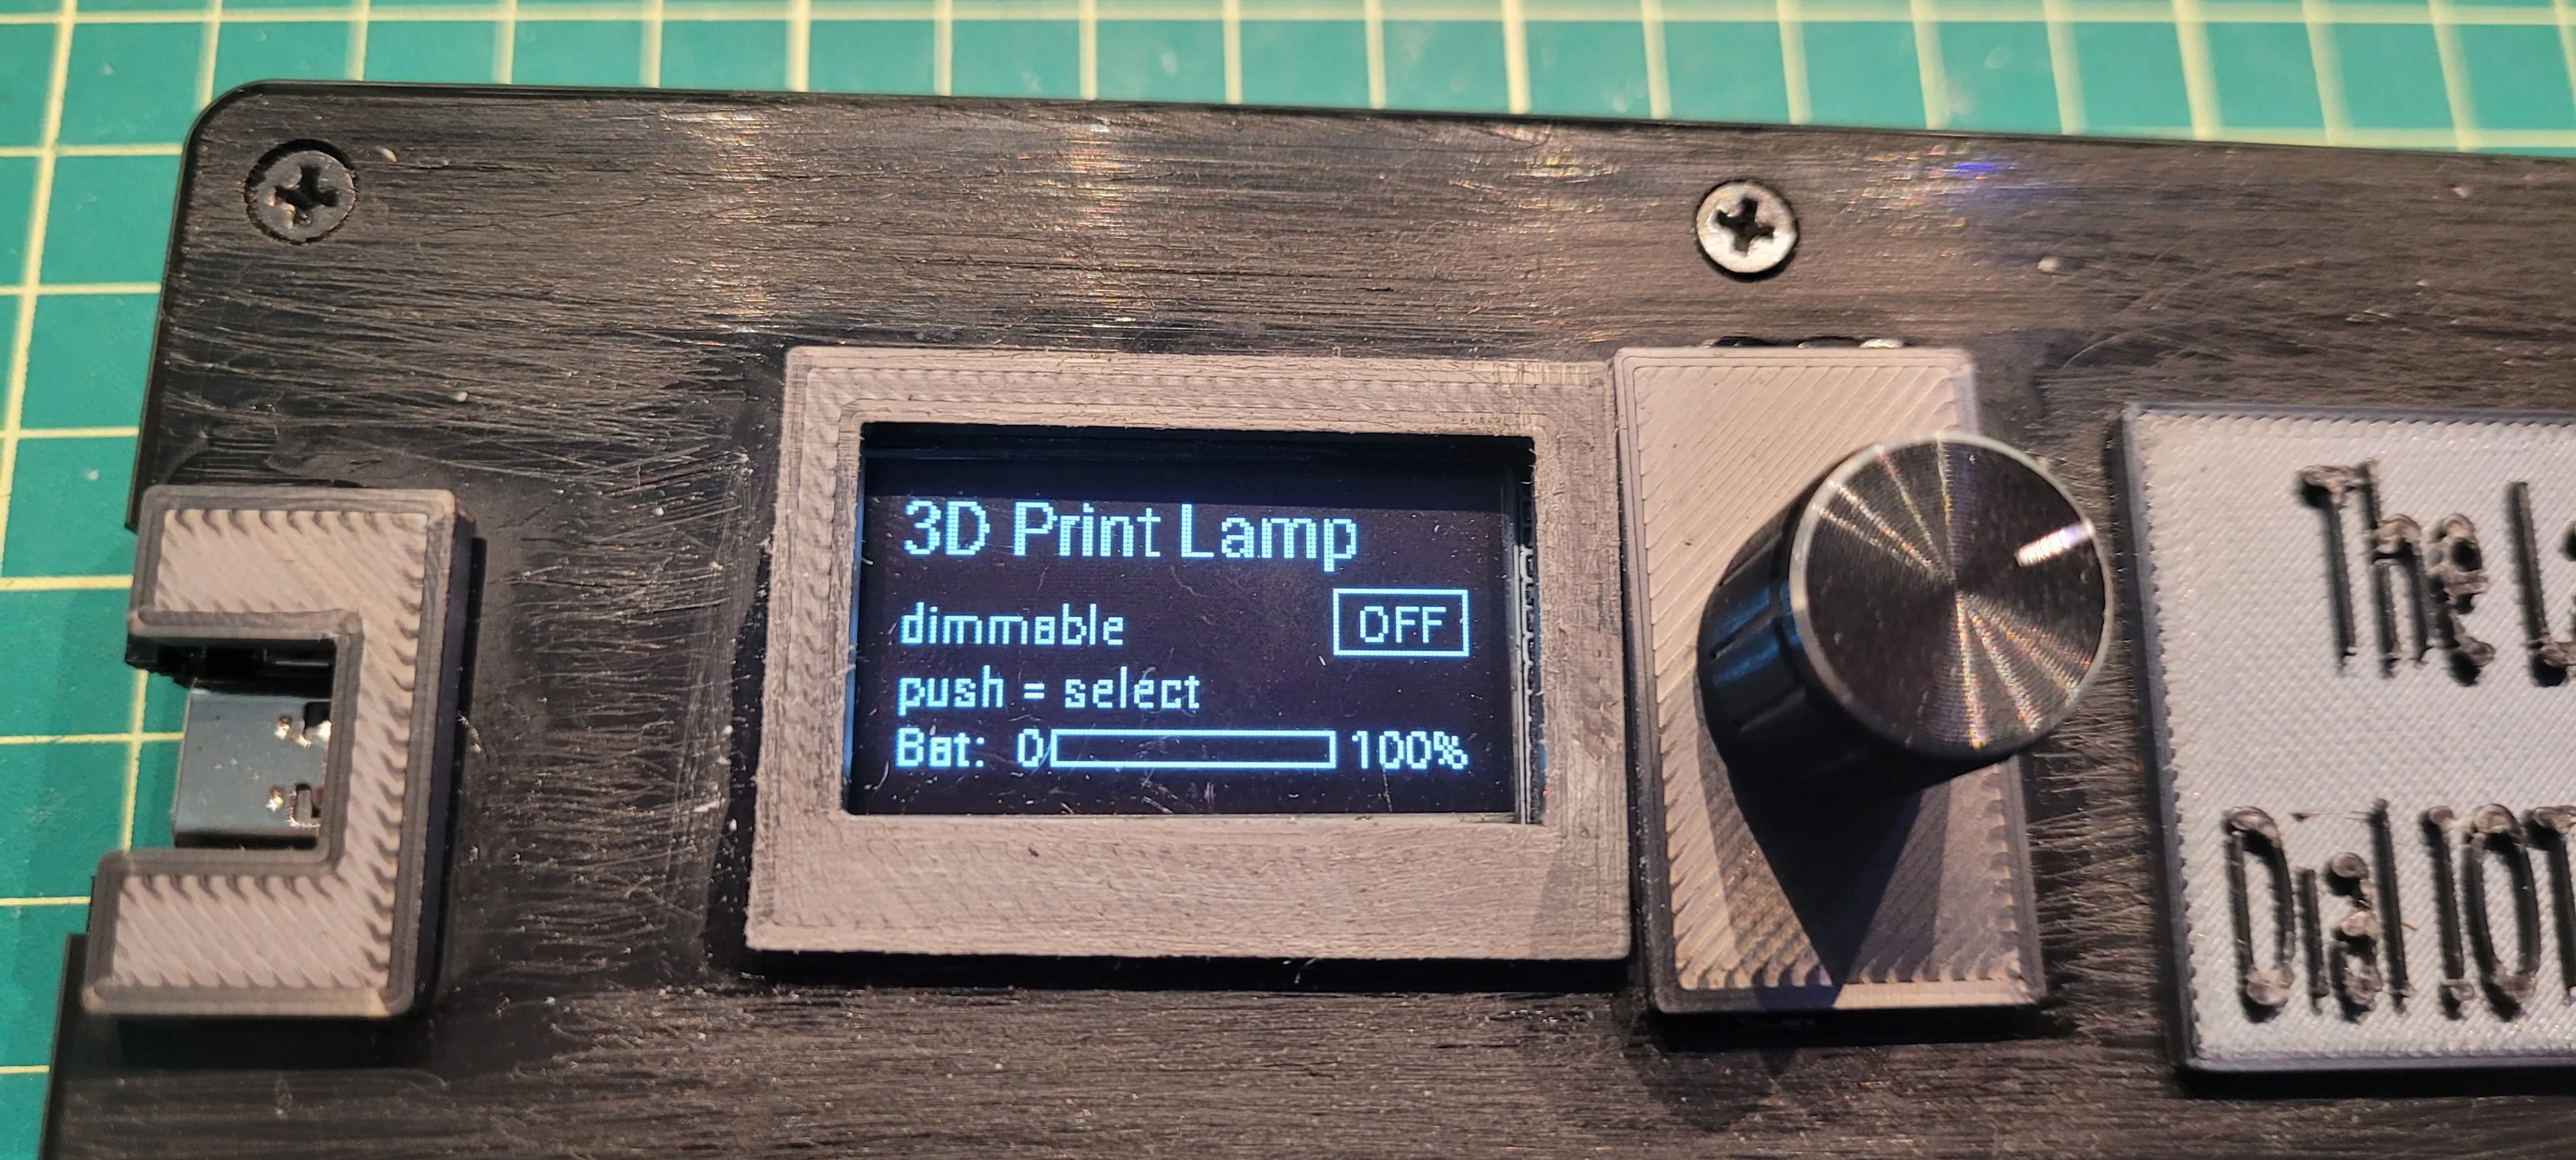
- Turn to scroll through the device list. Each entry shows its name, its type, and an ON/OFF badge so you can see the state before you touch anything.
- Push to act. An on/off device just toggles. A dimmable light turns on and drops you into a live brightness bar.
- Keep turning to dim or brighten, watching the bar move in real time.
That’s the whole interface. One thumb, one knob, no side buttons to explain. A guest can use it without being told how.
A couple of small touches that make it feel considerate rather than clever:
- The first turn after sleep only wakes the screen — it’s swallowed, so you never accidentally change something just by rousing the puck.
- It remembers where you left each light, so turning one back on resumes it at its last brightness.
- After ~20 seconds idle it quietly hands control back to the browse list (the light stays where you set it), so the next thing you do is just pick another device.
- After a longer idle the screen powers off and, if armed, the puck deep-sleeps until you turn the knob again.
The puck holds no relays and no automation logic. It’s purely a controller — every action is a Home Assistant service call over the encrypted ESPHome↔HA API. If the puck dies, nothing it controls is stranded; HA is always the source of truth.
Where it lives, and moving it around
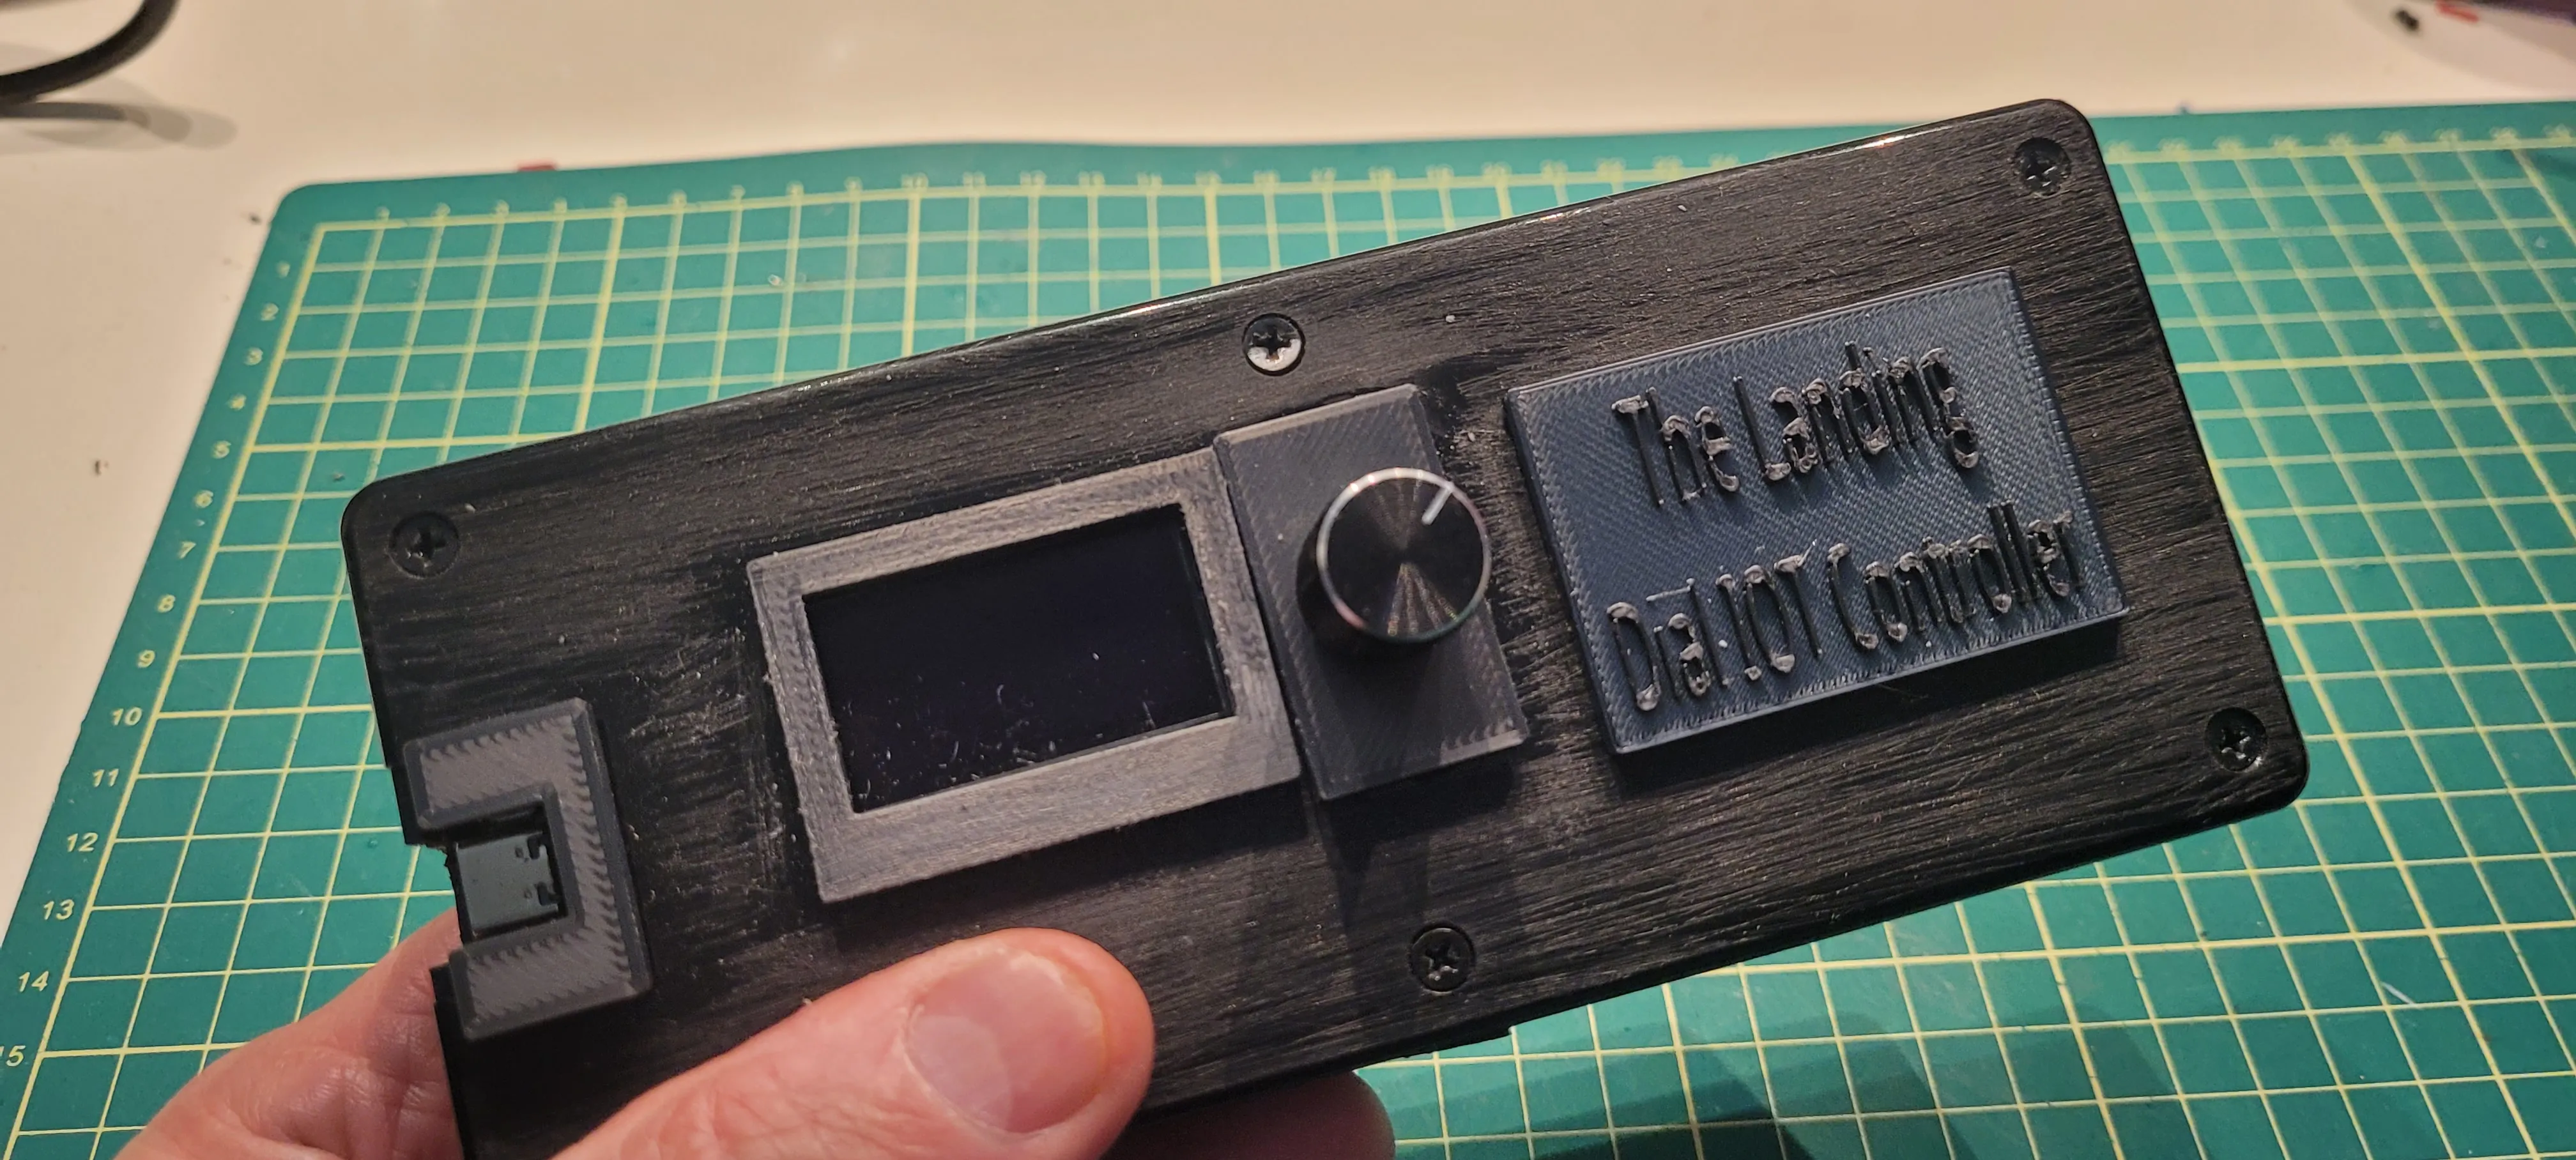
Right now MVdialer is built and running well. I’ve boxed it up so it survives cottage life, and it’s been holding its week-plus battery target in real use.
One design goal was that it should be re-homeable without a laptop. Because the device list is just a text file served by HA, moving the puck to a different house is a single change: point it at that home’s Home Assistant IP. That HA serves the file the same way and needs no extra software. There’s nothing to compile on-site.
[EDITOR: intro says the cottage runs an HA Green; some earlier docs say Yellow — reconcile to one board before publishing.]
Under the hood
Everything below is the “how it’s actually built” detail. Skip it unless you want the wiring — the story above is the whole project.
The design principles it was measured against
- Controller, not a hub. The puck never owns device state. HA is the truth; the puck sends commands and reflects state. Small firmware, consistent behavior, nothing stranded by a puck fault.
- Smart client, data-driven list. The fast stuff (drawing, selection, live brightness) is local so the UI never lags. The slow-changing stuff (which devices appear) lives outside the firmware as data. Adding a device is a data edit, never a code change.
- Sleep is a first-class feature. The device spends almost all its life asleep. The whole architecture is shaped around sleeping hard, waking fast, and showing correct info the instant it wakes.
- Always degrade gracefully. A network hiccup, an HA reboot, or a bad edit to the list must never leave the puck blank or useless. Every external dependency has a local fallback.
- Type-generic device model. Lights come first, but internally a “device” is abstract, so switches, fans, and scenes can join later without reworking the core.
The two modes
| Mode | Turn the knob | Push the knob |
|---|---|---|
| BROWSE | Move through the list (wraps, speed-limited) | Dimmable → enter CONTROL; on/off → toggle in place |
| CONTROL (dimmable) | Adjust brightness 0–100 %, live bar | Turn the light off and return to BROWSE |
A session, start to finish
- Wake — a knob turn wakes the puck (~1–2 s to reconnect Wi-Fi). The first input is swallowed so you don’t change anything just by waking it.
- Browse — turning moves the cursor; screen at medium brightness.
- Activate — pushing a dimmable turns it on at its last level, flashes “ON,” then reveals the brightness bar and brightens the screen.
- Control — turning dims live; values are throttled to HA so a fast spin doesn’t flood it, with a guaranteed final send when you stop.
- Auto-release — after a short idle, control hands back to BROWSE (screen still on) so you can pick another device.
- Sleep — after a longer idle the panel powers off and, if armed, the puck deep-sleeps until the next knob turn.
The timers that shape the feel
| Timer | Default | Purpose |
|---|---|---|
| Browse step throttle | 250 ms | Caps scroll speed so a flick doesn’t overshoot |
| Brightness send throttle | 150 ms (leading + trailing) | Smooth dimming without flooding HA; final value lands |
| CONTROL auto-release | 20 s | Idle in CONTROL → back to BROWSE, screen still on |
| Panel-off / deep-sleep | 60 s | Idle anywhere → screen off; deep-sleep if armed |
| Battery heartbeat | 12 h | Self-wake, report battery, sleep again |
The 20 s release and 60 s sleep are deliberately independent: control is handed back quickly while you’re still looking at the screen, but the panel keeps its own longer clock before going dark.
The device list: data, not code
The list is a plain text file served by HA at http://<ha-ip>/local/mvdialer.txt,
one device per line:
# Name | type | entity_id      (type = dimmable | onoff)
3D Print Lamp | dimmable | light.esphome_web_be7938_3dprinter_lamp
Desk Spot     | onoff    | switch.tuya_2_desk_spot
To add, rename, or reorder a device you edit that file and wake the puck. That’s it.
Why a file, and why on HA. Every other option hit a wall: a compiled-in list needs
a reflash per change; an HA input_text helper is capped at 255 characters; a
label-driven template is invisible in a plain editor. A text file has no length limit,
is trivially editable, updates live, and lives on the same HA the puck already
depends on — so it adds no new point of failure.
Why a pinned local IP. The URL points at HA’s local IP on purpose — no DNS, no remote/VPN path, always a plain local read. The puck is an ordinary Wi-Fi device with no VPN client, so it can only reach HA locally anyway; pinning the IP just makes that explicit and reliable.
How failure is handled:
- On boot the puck loads the last list it successfully fetched, cached in flash, so the dial is populated instantly — before Wi-Fi is even up.
- Once Wi-Fi connects it fetches the file; if the content changed, it re-parses and re-caches.
- If the fetch fails, it keeps the last-known list. The dial is never blank.
On a brand-new puck that has never fetched, a small compiled-in default list covers that first boot.
Power & battery
The battery strategy is built entirely around deep sleep:
- After 60 s of no input the ESP32 enters deep sleep, drawing microamps, until you turn the knob or the 12-hour heartbeat wakes it to report battery and sleep again.
- Waking on a turn rather than a button is deliberate — no reaching for a side control, and the encoder’s A channel sits on a wake-capable pin.
- In practice, sleep draw is dominated not by the CPU but by the battery-sense voltage divider. Everyday use (a handful of interactions a day, otherwise asleep) yields multi-week runtime per charge.
Instant battery readout on wake. Deep sleep wipes RAM, so a freshly woken puck would show a blank gauge while its ADC settles. To avoid that, the last measured voltage is persisted to flash and painted immediately on wake, then overwritten the moment a fresh reading lands. Never blank, never stale for long.
Dev-safe sleeping. Deep sleep is gated behind a Home Assistant switch (“Sleep Mode”) that defaults off. On the bench the puck stays awake and reachable for iteration and OTA; sleeping is only armed for deployment. The update path can never be locked out by a sleeping device.
ESP32-C3 features the design leans on
Built on ESP-IDF, this is where the chip earns its place:
- Native USB Serial/JTAG — first flash and all debug logging go straight over USB-C, no external UART adapter, and the hardware UART pins stay free for later.
- Deep sleep with RTC-domain GPIO wake — the encoder’s A channel is on an RTC-capable pin, giving true turn-to-wake at microamp standby; a timer wake handles the 12-hour battery heartbeat.
- Non-volatile storage (NVS) — the persisted battery voltage and cached device list survive deep sleep and power loss. The list is stored as a single binary blob, which sidesteps the size limit on persisted strings and holds the whole list.
- ADC1 battery sensing — a resistor divider feeds an ADC1 channel; the firmware applies attenuation for full-scale range, oversamples to cut noise, and maps voltage to state-of-charge through a LiPo discharge curve.
- Wi-Fi modem sleep + fast reconnect — the radio naps between beacons and
fast_connectskips the scan on wake, so reconnection is quick and cheap. The puck mostly sends, so a little inbound latency is invisible. - On-board LiPo charging — charge over the same USB-C used to flash it.
- Hardware I²C at 400 kHz — drives the SH1106 128 × 64 OLED at a smooth ~8 fps.
- GPIO interrupts with input filtering — encoder and button use interrupt-driven inputs with internal pull-ups and short debounce, so detents and presses are caught reliably without polling.
- Strapping-pin-aware pin map — the I²C lines land on GPIO8/GPIO9 (strapping pins, but benign for I²C since strapping only matters at boot), and other boot-strapping pins are avoided, so the board always boots clean.
Where it goes next
The type-generic device model is the seam for future capability. The nearest planned extension is a 433 MHz RF ceiling fan: a CC1101 sub-GHz transceiver on the board’s reserved SPI pins, captured and replayed through Home Assistant’s RF platform, then added to the dial like any other device — turn for speed, push for off. The OLED, control loop, and device list need no structural change.
Beyond that, if it keeps proving itself, this feels like a real candidate for a proper PCB instead of a hand-wired prototype.
It’s still a prototype, and it looks like one — but it’s enclosed enough to survive cottage life, and there’s a tiny mismatch between the on-screen mockup and the real OLED in the video below that you won’t notice in person. For a little idea that started as “how do guests turn the lights down,” it’s working remarkably well.